This is a simple tutorial on creating an NDES server to utilize SCEP with Jamf Pro. Configuring an NDES server allows organizations to connect Jamf Pro to their Active Directory Certificate Authority to distribute certificates via SCEP. You can use SCEP to distribute certificates to computers via Jamf Pro rather than using Jamf’s AD CS Connector software. Either works fantastically depending on your needs.
Remember, the S in SCEP stands for Simple.
Prerequisites
- A Windows Server joined to your Active Directory Domain.
- An Issuing CA configured on a Windows Server joined to your Active Directory Domain.
- A Managed Service Account which is a member of with the IIS_IUSERS group added as a local user on the NDES server.
- A Certificate Template created with the CA that the NDES server is connected to.
- Read and Enroll permissions on the desired certificate template used for SCEP enrollments.
- Knowledge of installing Windows server roles.
- Time, patience, and troubleshooting skills for when it inevitably goes wrong.
Add NDES Service Account to Local Users
Ensure that a Managed Service Account is created on your AD Domain and a member of the IIS_IUSERS group.
- Search lusrmgr.msc in the Windows Server Start Menu search box, then press enter to open the program.
- Double click on Groups.
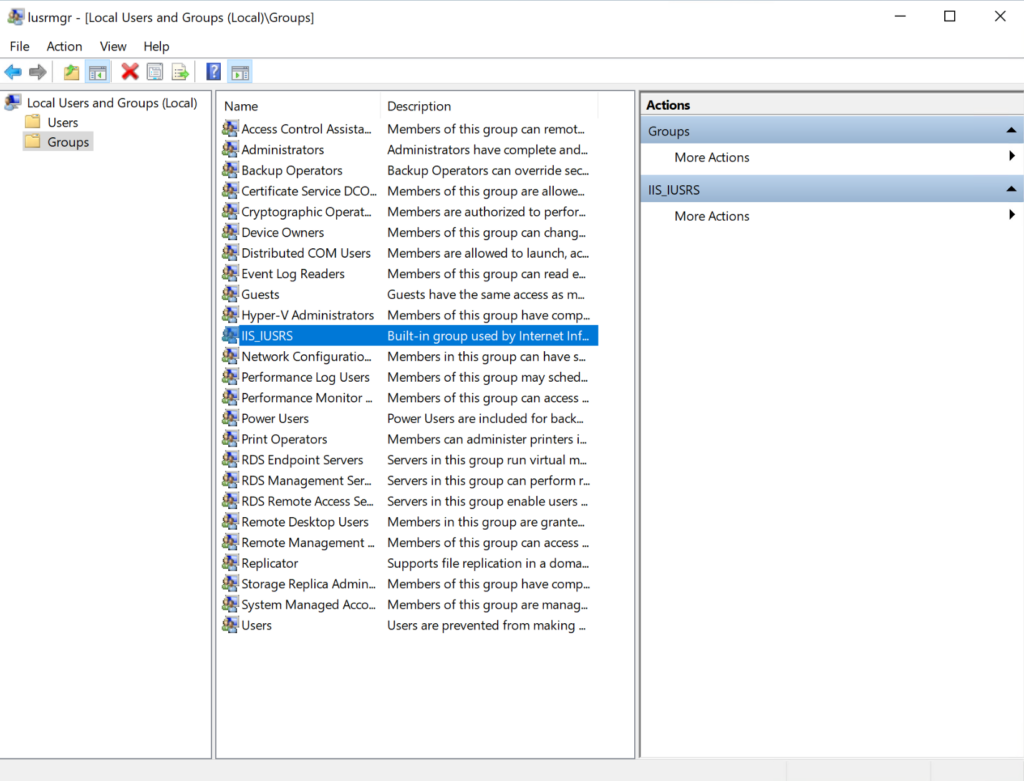
- Double click on IIS_IUSRS.
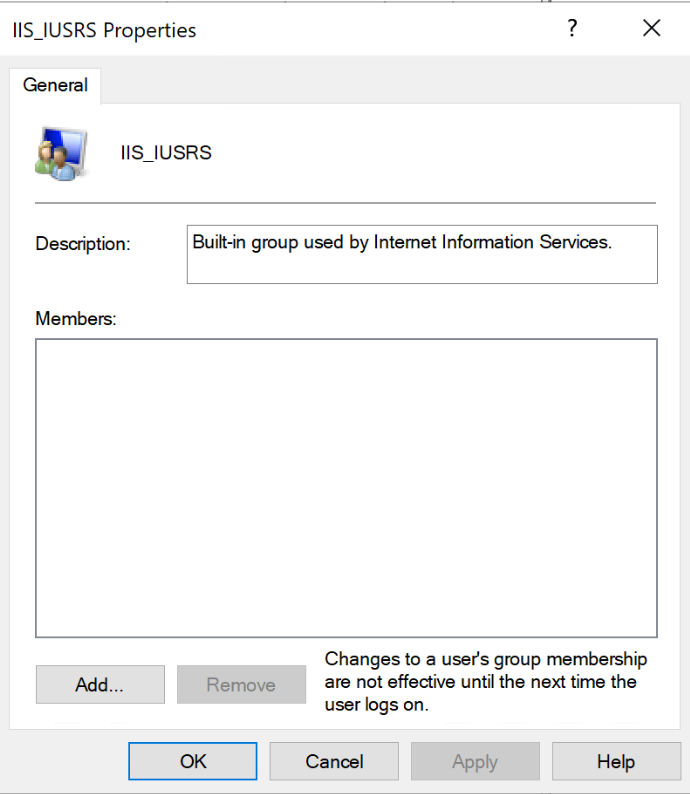
- Click on Add…
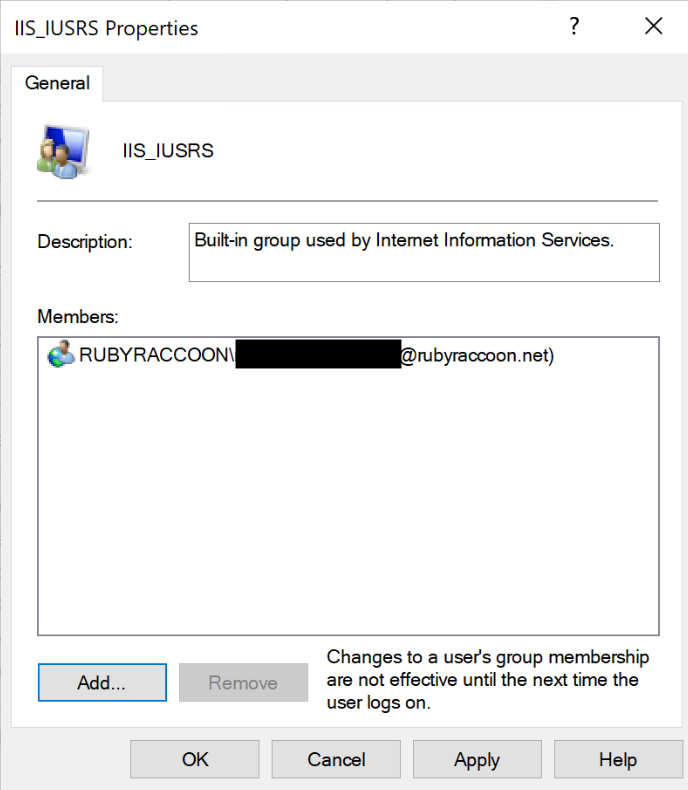
- Enter the username of your service account and click OK.
- Click Apply, then Ok.
- Close lusrmgr.msc
Installing NDES as an AD CS Server Role Service
- Connect to your Windows Server and open Server Manager if it’s not opened automatically.
- Once loaded, click Manage in the top right corner, then click Add Roles and Features.

- Advance through Before you Begin.
- Ensure that Role-based or Feature-based Installation is selected in Installation Type, then click Next.

- Ensure that the correct server name and IP address are selected in the Server Selection section, then advance through this section.
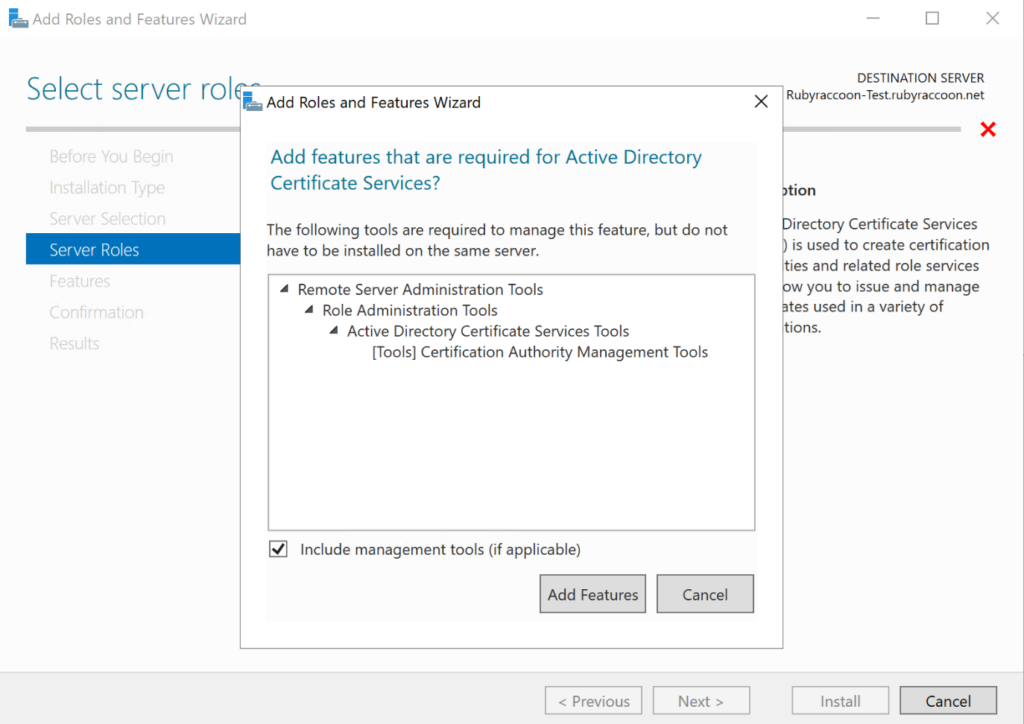
- Select Active Directory Certificate Services in the list of Roles.


- Click Add Features in the pop-up window, then click Next to advance through the Server Roles section.
- Click Next to advance through the Features section
- Click Next to advance through the AD CS section
- In the Role Services section, uncheck Certification Authority then check Network Device Enrollment Service.
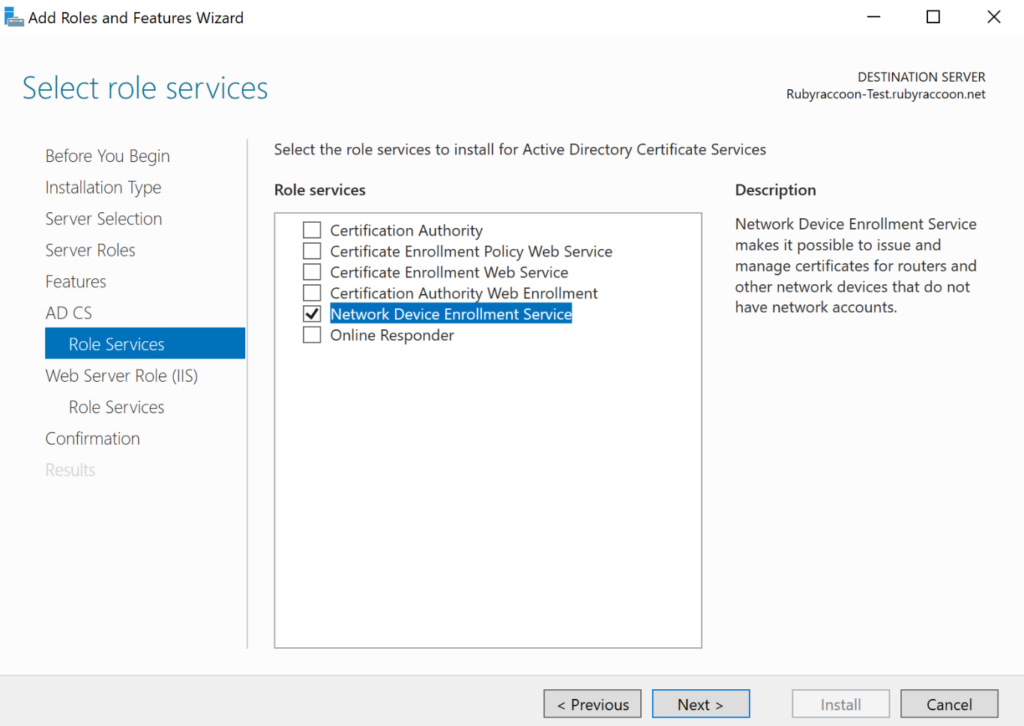
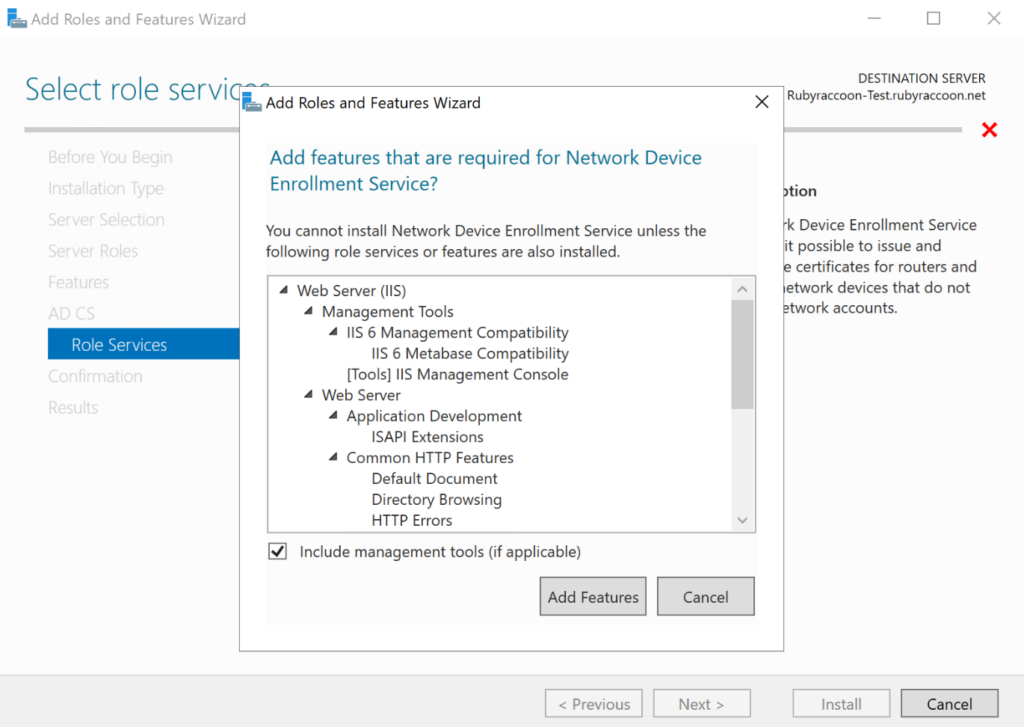
- Click Add Features in the pop-up, then click Next to advance through the Role Services section.
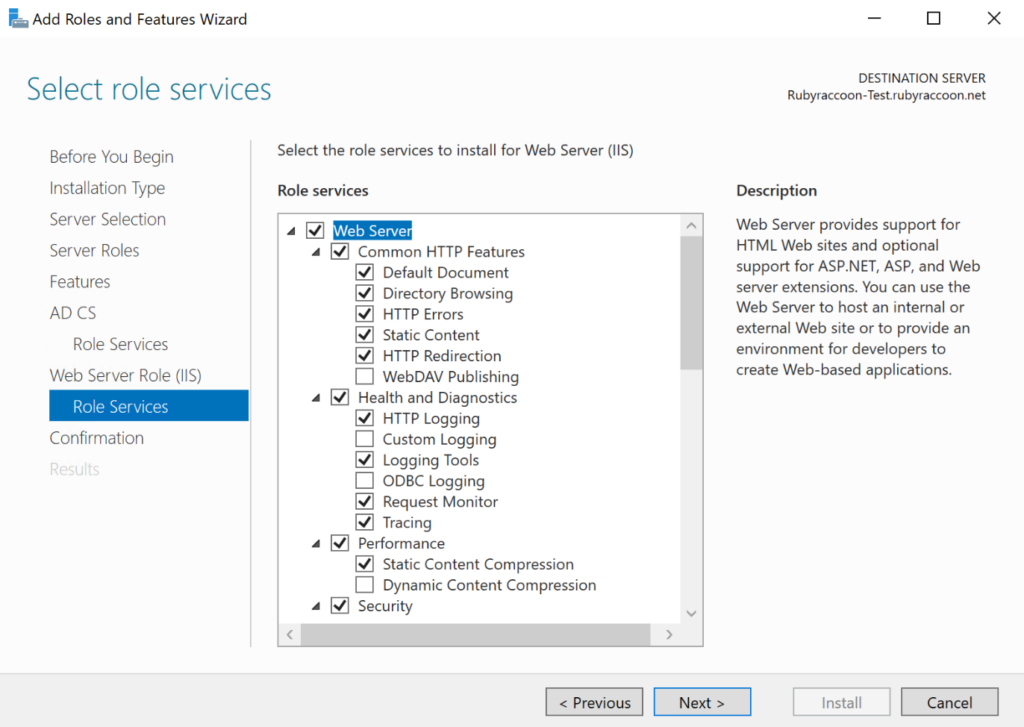
- Click Next to advance through the Web Server Role (IIS) section
- Leave the default Role Services selected under the Web Server Role (IIS) Role Services section, then click Next.
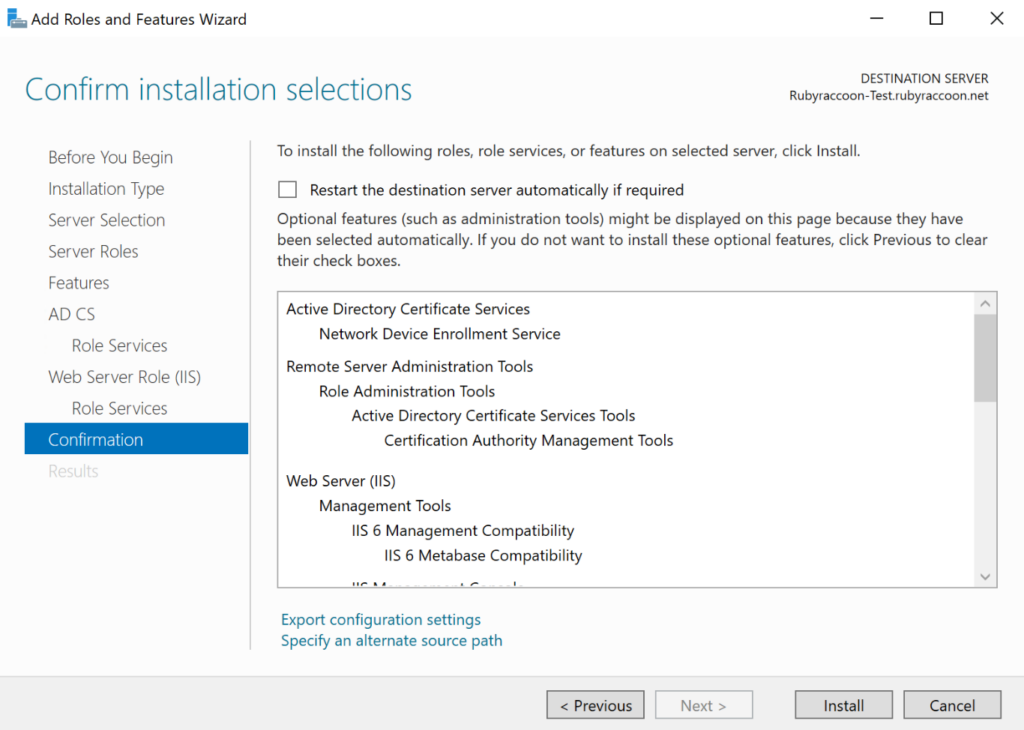
- Click Install.
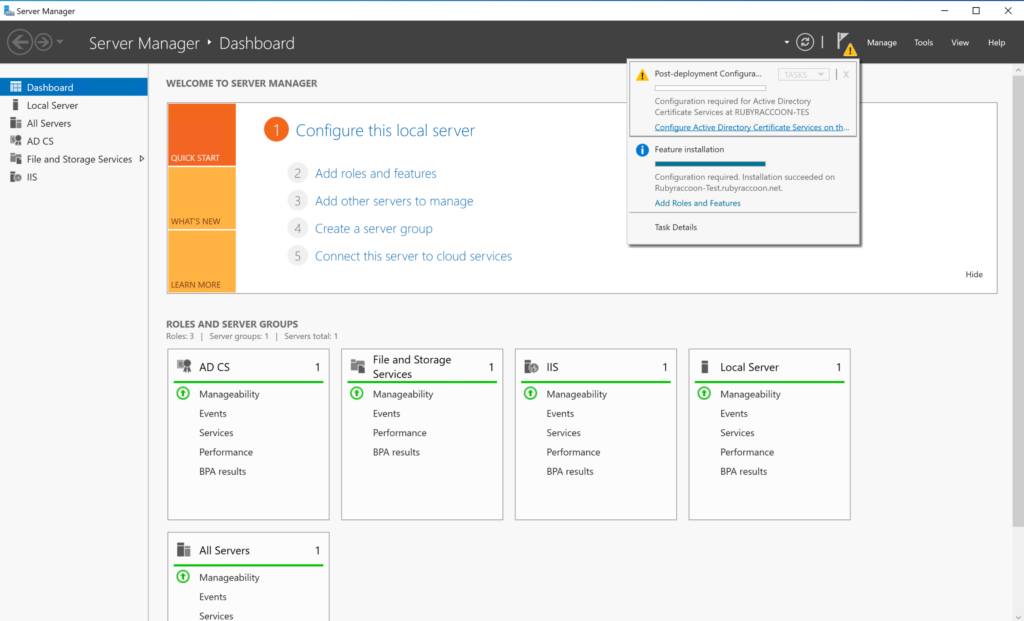
- Once completed, you will see a Notification in Server Manager.
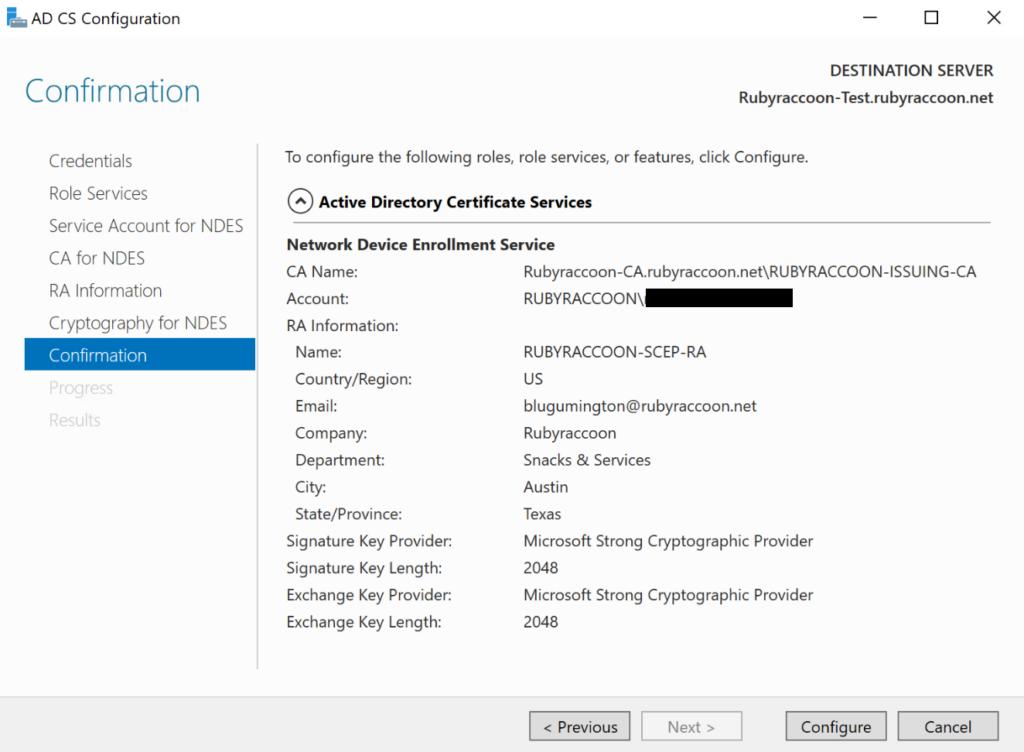
Configure NDES
- Click on the Notifications icon, then click Configure Active Directory Certificate Services on the destination server.
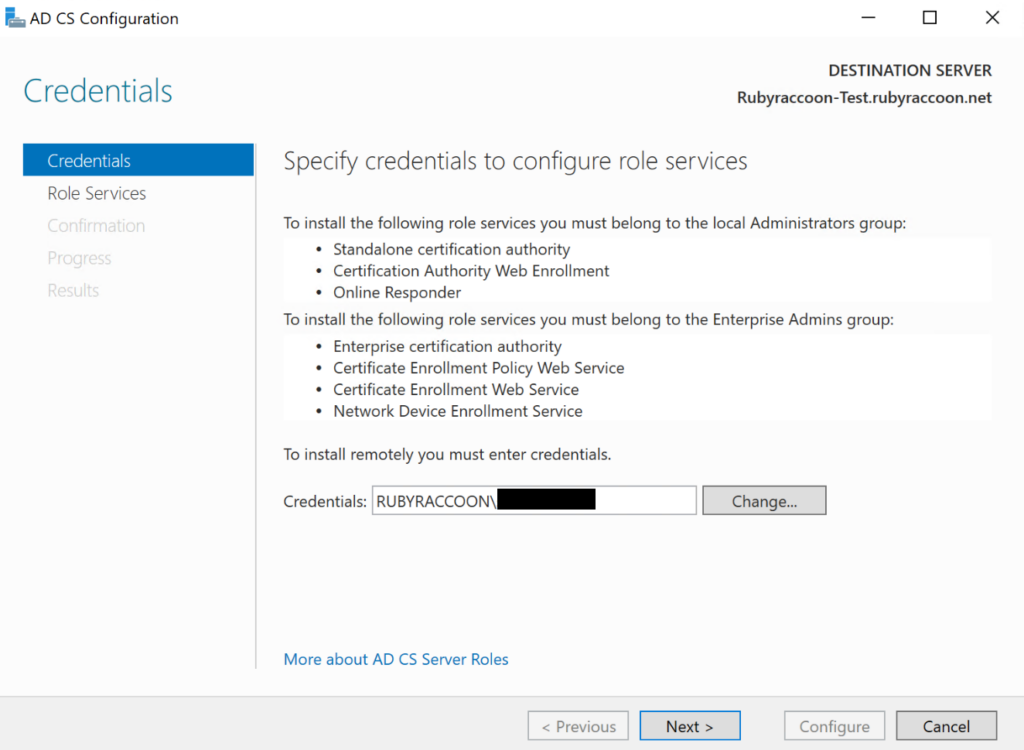
- Click Change on the Credentials field and enter your account credentials, then click Next on the Credentials section.
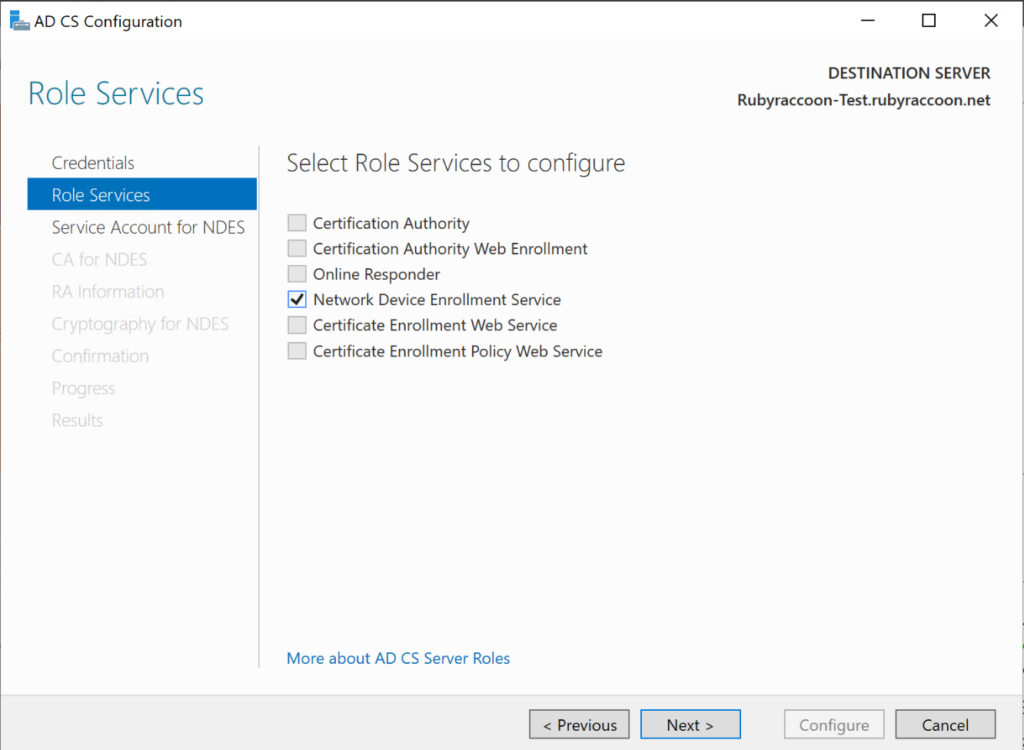
- Select the Network Device Enrollment Service role under the Role Services section, then click next.
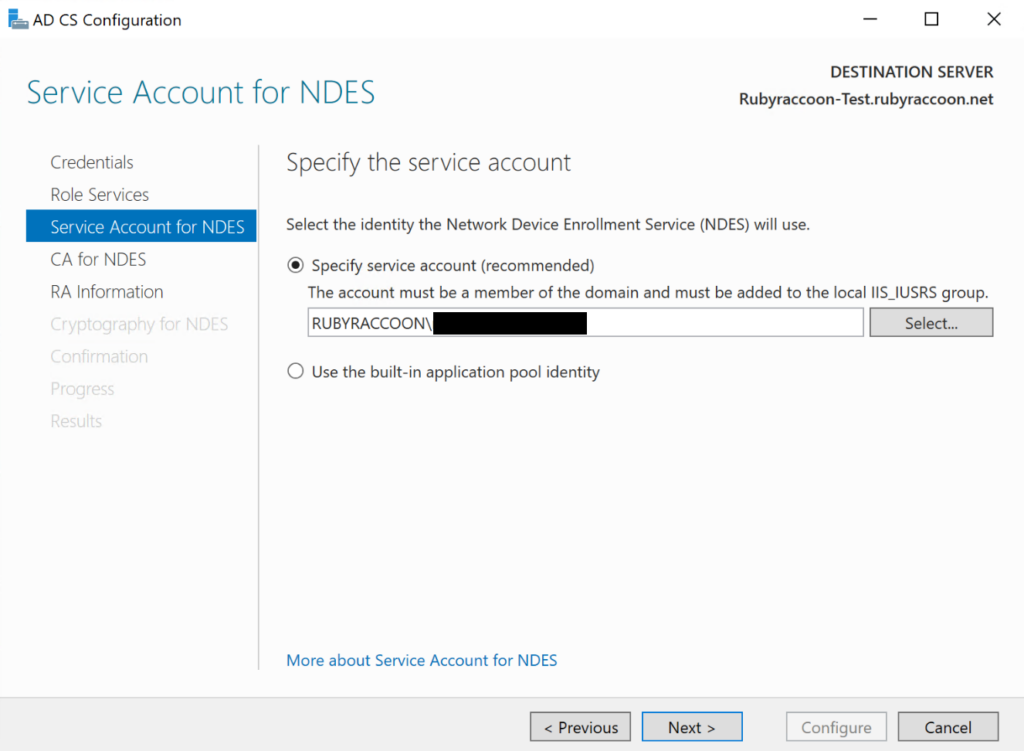
- Click Select on the Specify service account field and enter the logon name and password of your SCEP service account in the authentication prompt, then click Next to advance through the Service Account for NDES section.
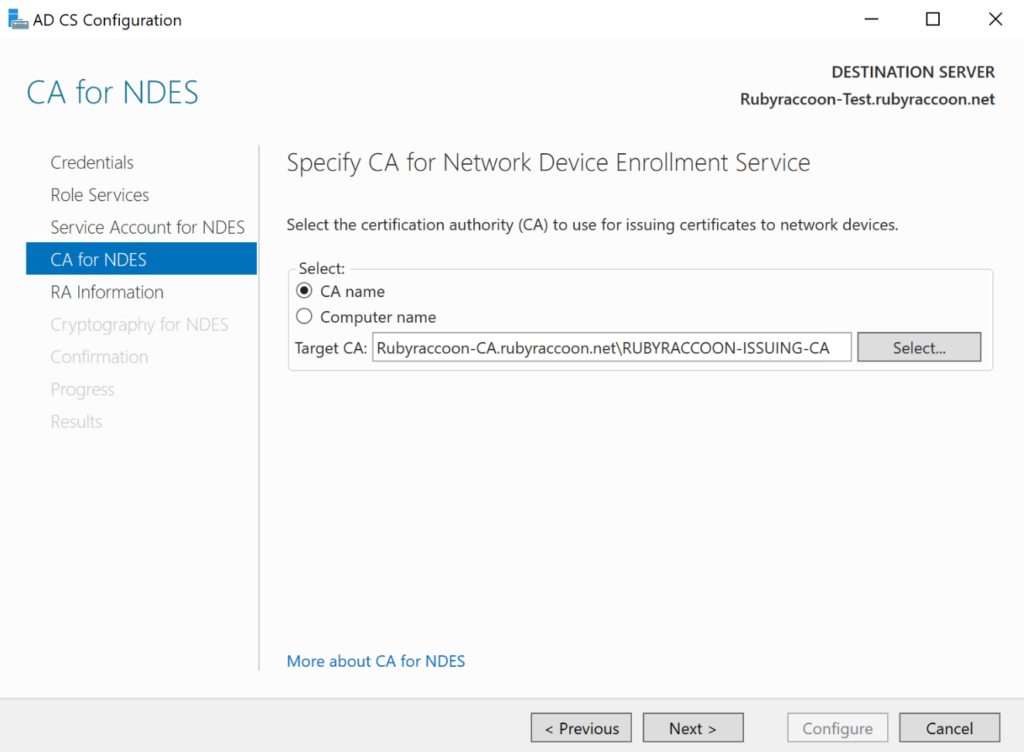
- Click Select to select your CA Name or Computer Name (either can be used).
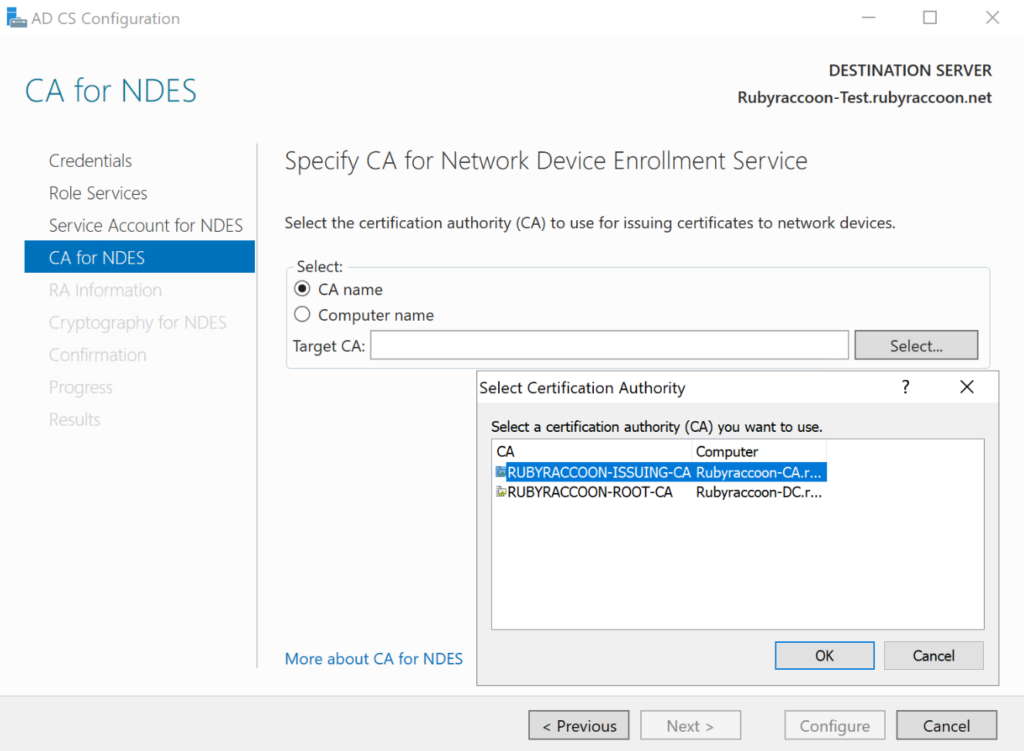
- Click Next to advance through the CA for NDES section.
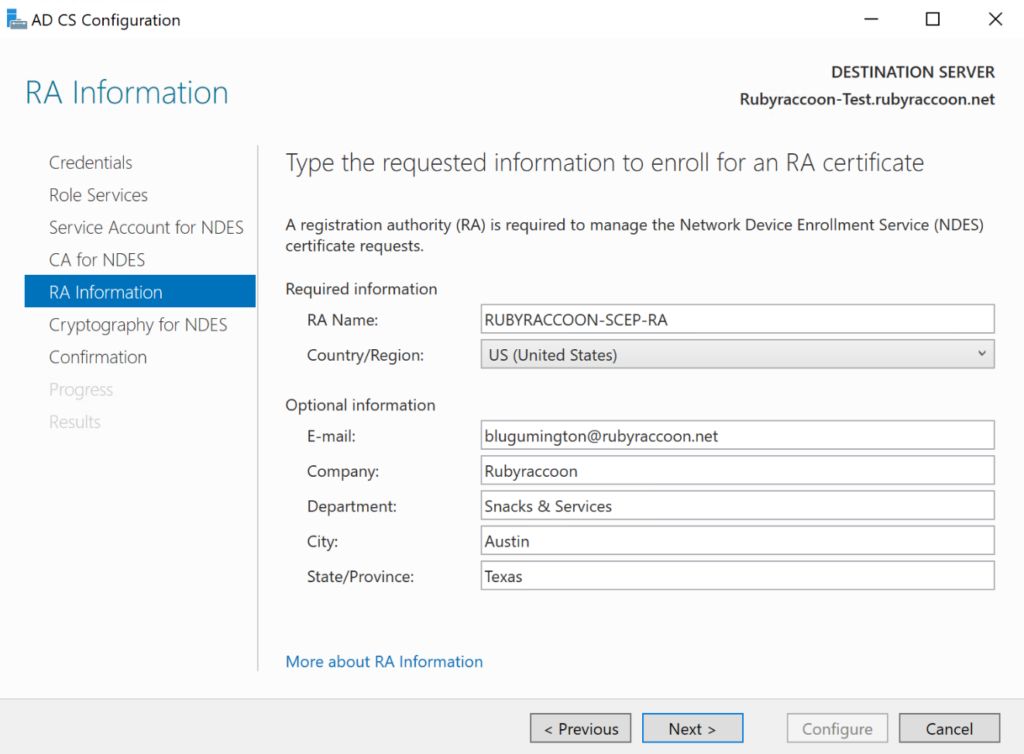
- Click Next to advance through the RA Information section, or fill out the optional information section and then click Next.
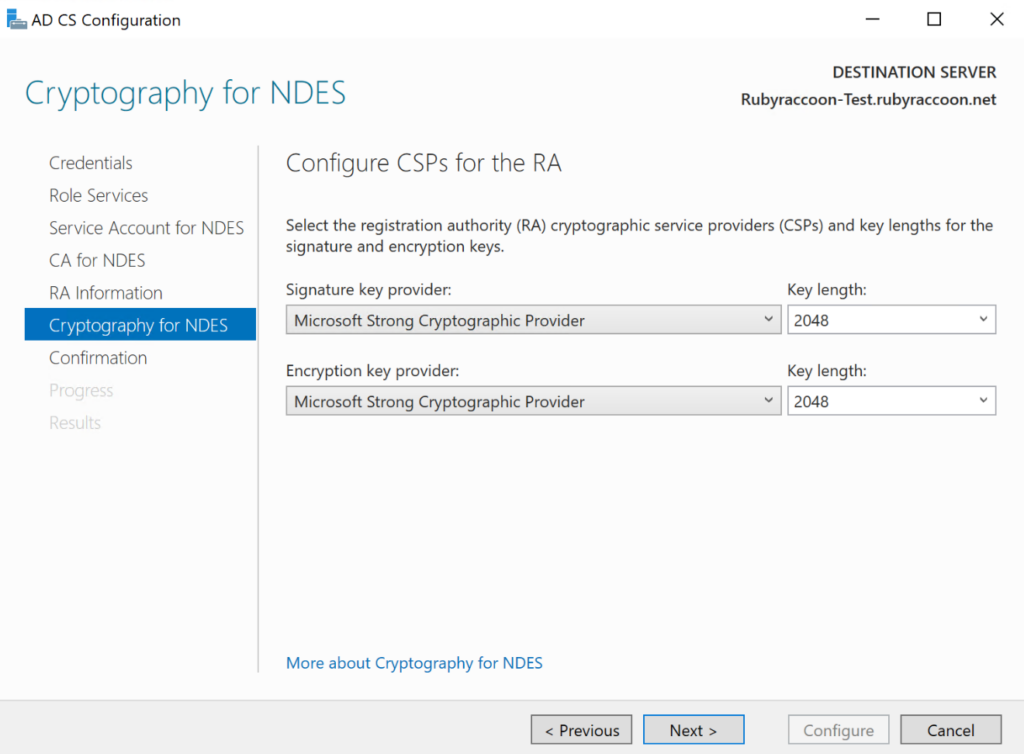
- Click Next to advance through the Cryptography for NDES section, or optionally make changes here and get lots of experience troubleshooting your NDES server in the future.
- Click Configure to finish configuring NDES.
Once finished, restart the VM.
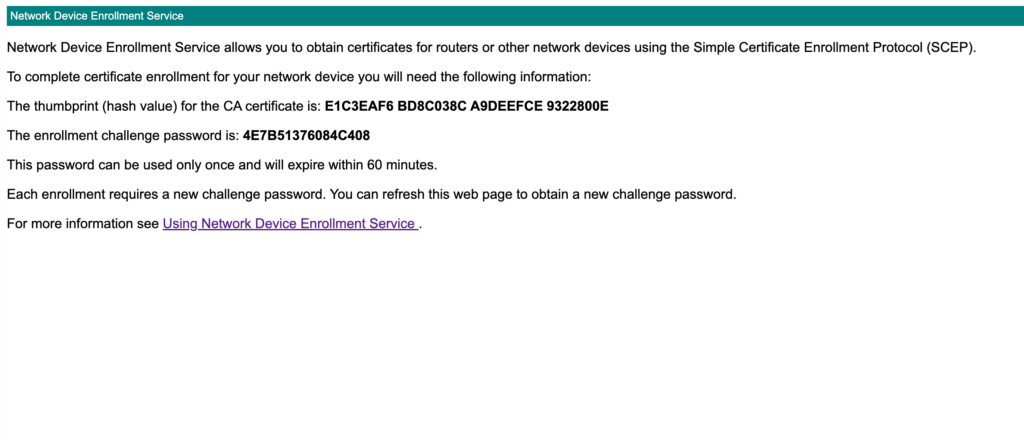
Congratulations! NDES has been configured according to Windows Server. There is still more to do though. You can test out your NDES server by navigating to http://your-server.your-domain.ad/certsrv/mscep_admin in a browser on the Windows Server VM:
- Authenticate with the username and password of the NDES service account to see the SCEP Challenge Password.
- You should see something similar to the image below.
Configure NDES Certificate Template and Advanced NDES Settings
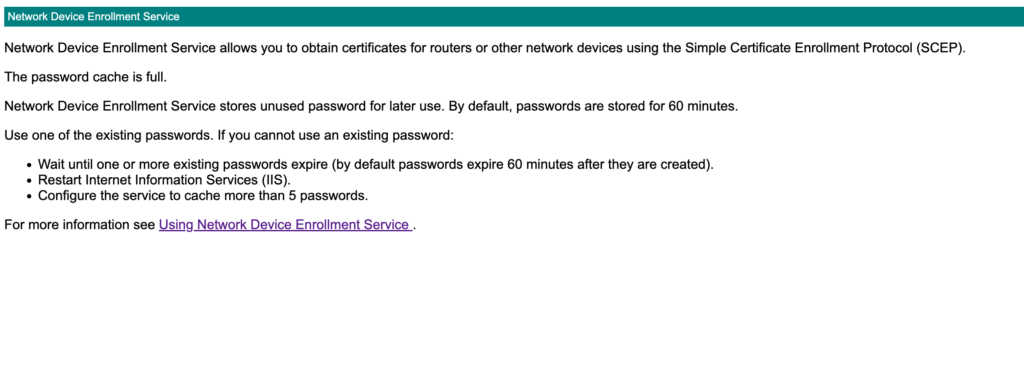
By default, NDES has a limited number of Challenge Passwords it will present in a given time until an enrollment is complete (EG: A certificate is requested and successfully installed on a supplicant). This is based on the PasswordMax registry key. Once the PasswordMax is reached, certificate enrollment via SCEP is not possible until an enrollment completes or the expiration time period passes.
Default PasswordMax value reached:
Changing the PasswordMax Registry Key
- Using the Windows Server Start Menu search box, search for regedit.msc, then open the program.
- Once open, paste or type this into the Regedit address bar:
HKEY_LOCAL_MACHINE\SOFTWARE\Microsoft\Cryptography\MSCEP
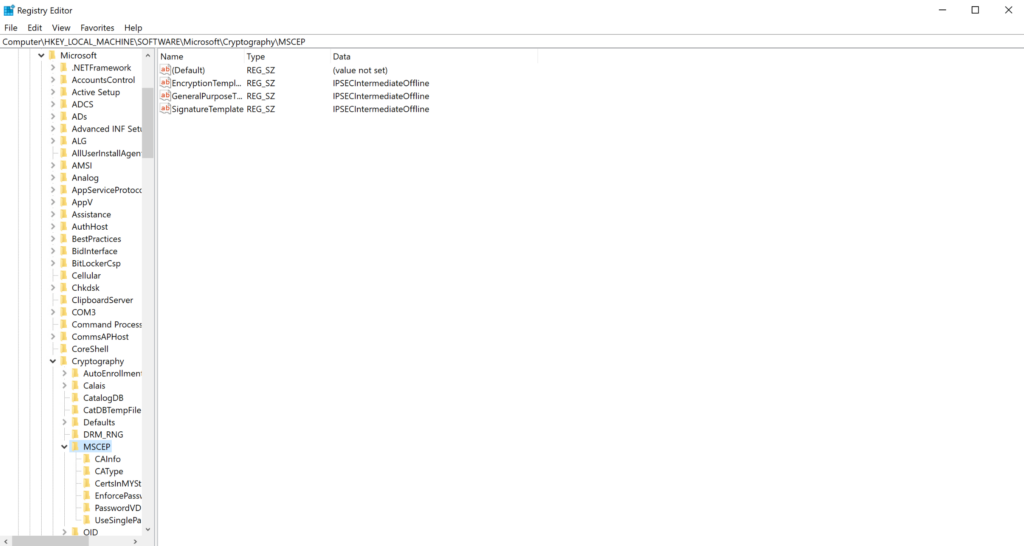
- Right click on MSCEP → New → Key.

- Enter the value PasswordMax.
- Double click the PasswordMax key to open it.
- Right click any empty space below the existing keys, hover over New, then click DWORD (32-bit value).
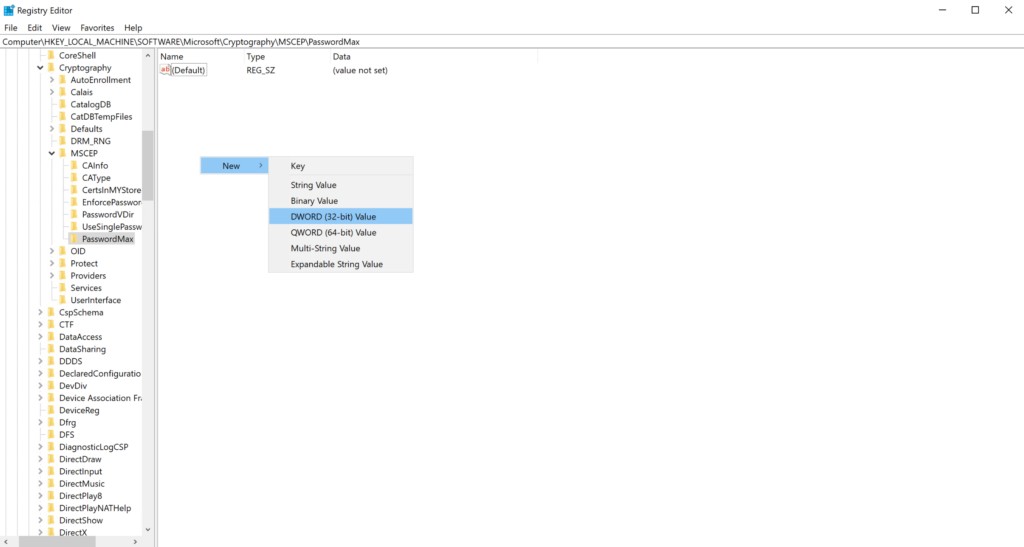
- Name the new key PasswordMax.
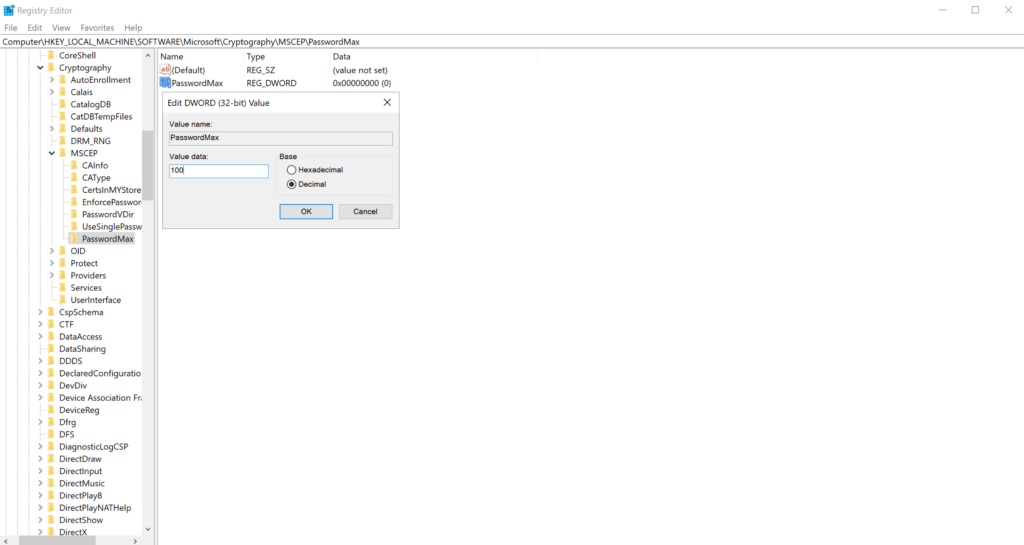
- Double click the PasswordMax key, or right click and then click Modify, to modify the D-WORD Value.
- Set the value to “64” hexidecimal. This would equal 100 in decimal format. You can also change the format to decimal and enter “100”.
- Any large number here will work. You may want to make this number large but not that large. Scale it with back-of-envelope math to their environment.
- EG: 50 devices → PasswordMax=75 in decimal format. 500 devices → PasswordMax=750 in decimal format. 5000 devices → PasswordMax=7500 in decimal format.
- Click OK, then exit RegEdit.
- Navigate to Server Manager → Tools → Internet Information Services (IIS) Manager.
- Click on the name of your server.
- Click Restart under Manage Server.
- Note: Sometimes you have to restart the VM, not just the IIS Webserver
Creating the SCEP CA Template
- Connect to the Windows server with your desired Certificate Authority.
- Search Certification Authority in the Windows search box, then open the program.
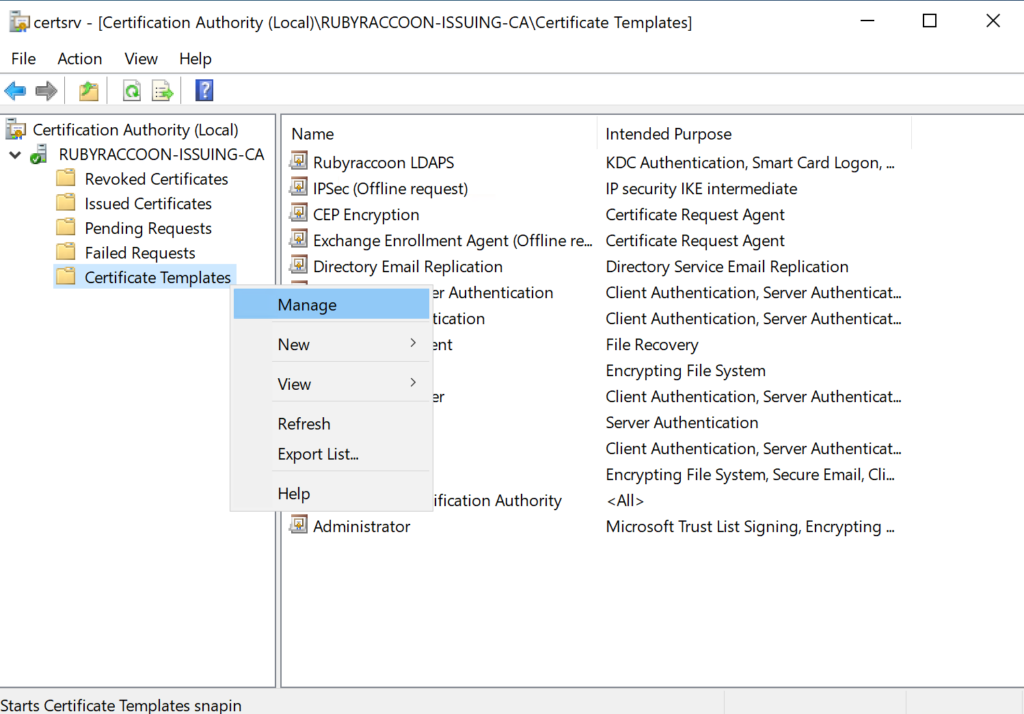
- Right click on Certificate Templates, then click Manage.
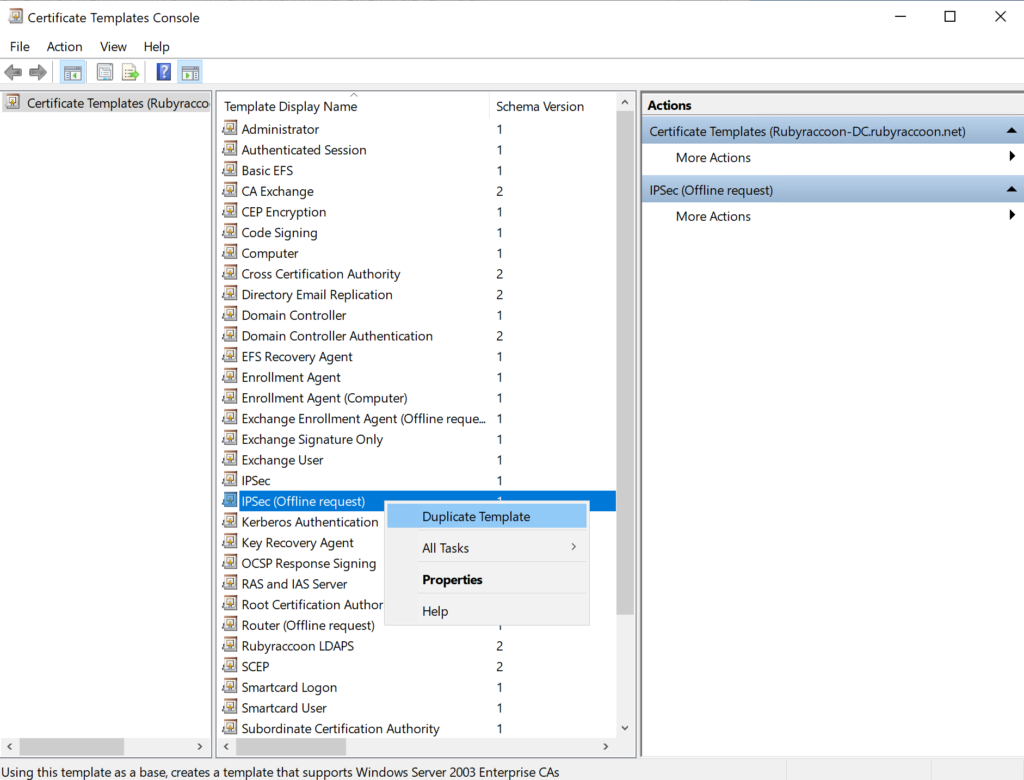
- Right click on IPSec (Offline request), then click Duplicate Template.
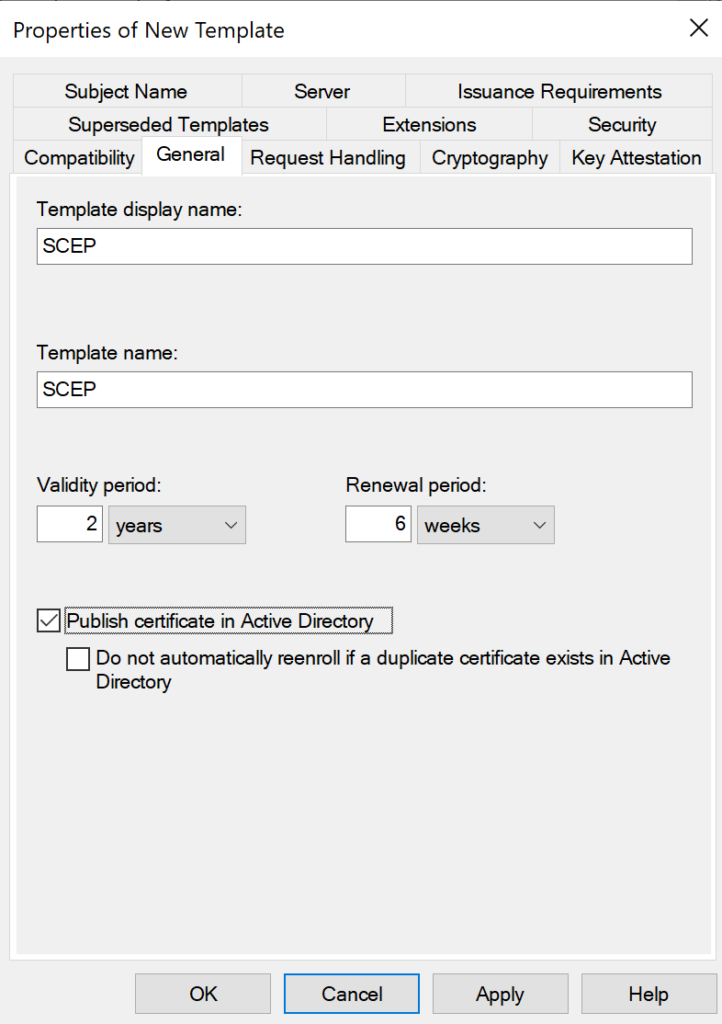
- Click on the General tab and set an appropriate name, then select Publish certificate in Active Directory.
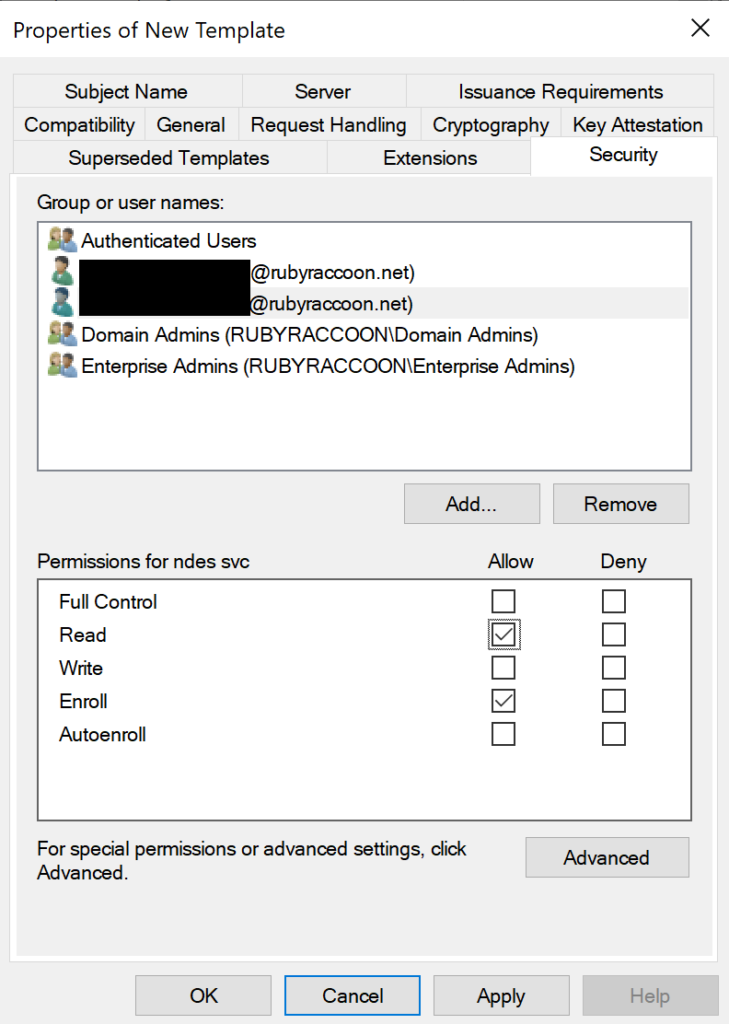
- Slick on the Security tab and ensure your NDES Service Account has at least the Read and Enroll permissions.
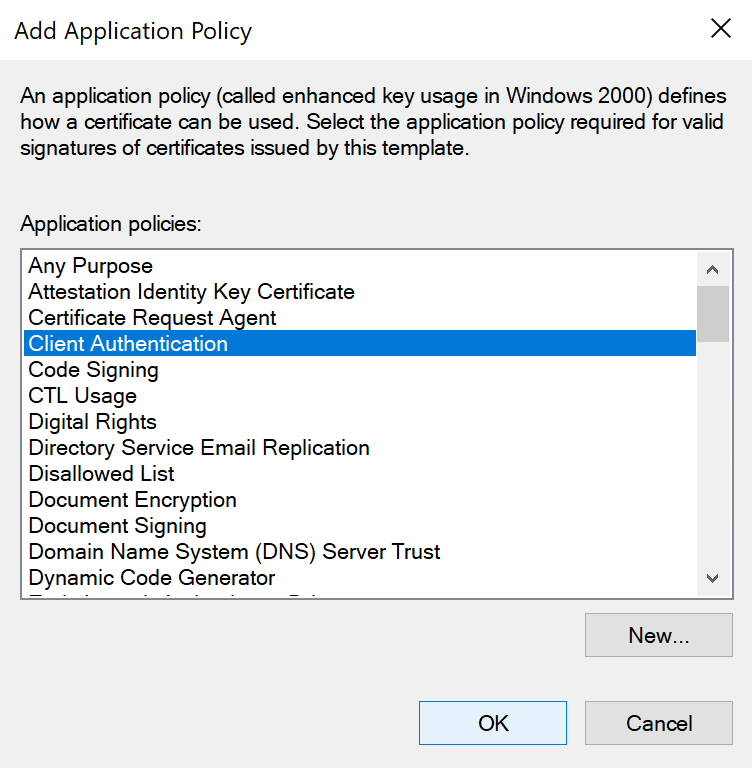
- Click on the Extensions tab, select Application Policies, then click Edit.
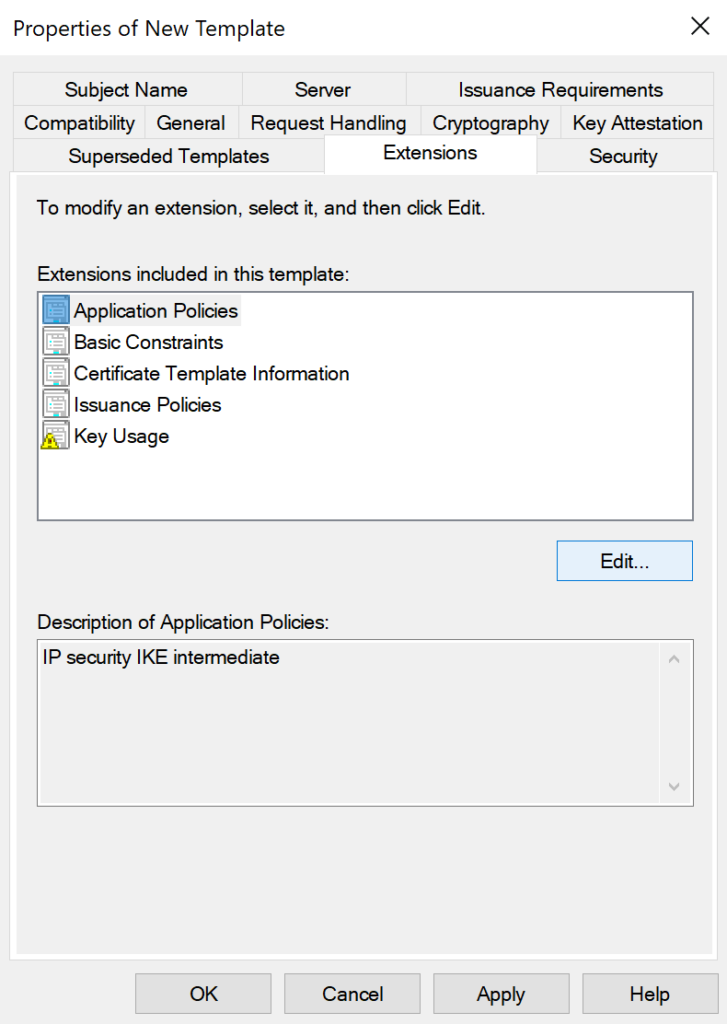
- Remove IP Security IKE intermediate, then add Client authentication, then click OK twice to return to the Properties of New Template window.
- Click Apply then OK.
Changing the certificate template used by SCEP enrollments
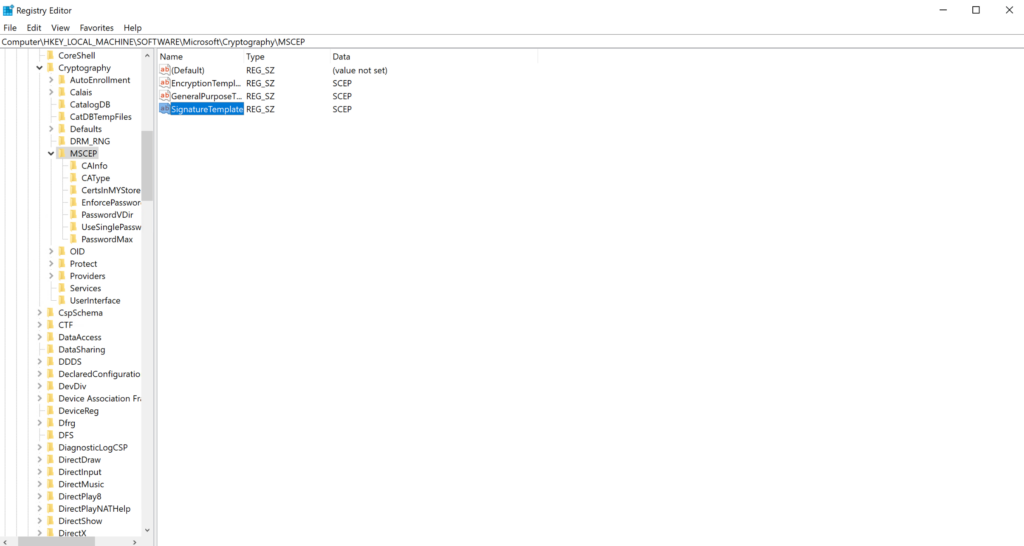
Another default setting of NDES is the certificate template which is used during SCEP enrollments. This is based on the HKLM\Software\Microsoft\Cryptography\MSECP\ registry key
- Using the Windows Server Start Menu search box, search for regedit.msc, then open the program.
- Once open, paste or type this into the Regedit address bar:
HKEY_LOCAL_MACHINE\SOFTWARE\Microsoft\Cryptography\MSCEP

- Double click the GeneralPurposeTemplate key, or right click and then click Modify, to modify the key.
- Type or paste the name of the certificate template which should be used for SCEP certificate requests. Keep in mind, this is the value from the TemplateName field, not the TemplateDisplay field. There are NO SPACES in this value.
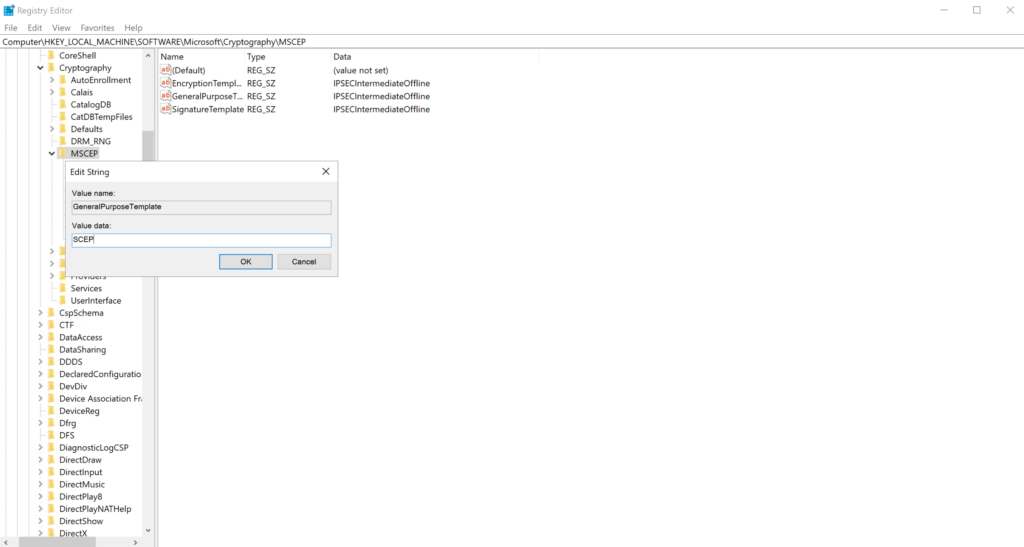
- Click OK to confirm the change.
- Repeat the process for EncryptionTemplate and SignatureTemplate, using the same value for all three templates.
- Confirm all three Template keys have the same value, then exit RegEdit.
- Navigate to Server Manager → Tools → Internet Information Services (IIS) Manager.
- Click on the name of your server.
- Click Restart under Manage Server
- Note: Sometimes you have to restart the VM, not just the IIS Webserver
Congratulations! You now have an NDES server to use in order to distribute certificates to Macs and iOS devices with Jamf Pro.